


Lead-Safe Painting in Oakland: Inside a Lead-Based Paint Project

Chad Feagley • September 11, 2026

Share this article

Good morning. I am Chad with Cutting Edge Painting, and today I wanted to walk you through a very specific style of project that is all around the Bay Area, but even more steps need to be taken when it comes to the city of Oakland. So today I want to walk you through a lead-based project.

What Is Lead, and What Was It Used For?

Lead is a heavy metal mixed with many substances. It was used in plumbing materials, gas, paint, and overall construction materials. It was very big in the 40s and 50s, it was widespread, and it was cheap. Paint specifically, lead was used to make paint dry faster, last longer, and resist moisture, which sounds great, right? We could all want that. Wrong.

Why Lead Is Harmful

Lead is harmful. Lead can enter the bloodstream and accumulate in various areas, causing brain damage, learning disabilities, and organ failure. This can be an especially heightened risk for kids under six and pregnant women who are exposed.

Where Lead Is Found

Now, where is lead found? Lead is in most homes built before 1978. Lead can be found in the exterior of a home or the interior of the home, but I will say that the interior of a home is a lot easier to control and contain when it comes to these kinds of projects. The Consumer Product Safety Commission issued the final federal ban in 1978, so that is when they officially stopped making paint with lead and selling it.

Most homes built around here in the Bay Area were built before 1978. Yes, there are some new construction sites going up, but there is a good chance that the houses we work on, or even the homes that you live in, contain lead.

EPA Certification Is the First Step

There are specific mandated processes that we have to follow in order to be able to handle lead safely, and the first step in that process is for me to get my EPA certification. That entails an eight-hour course where I learn all the different processes on how to contain lead and how to dispose of it properly, while keeping our client safe and our crew safe. When that is completed, I get my certificate, and then I am free to go ahead and start handling EPA necessary projects.

NATEC certificate of completion for lead safety training for Chad Feagley of Cutting Edge Painting

Oakland's LBP Permit Requirement

Now, the city of Oakland put in a law in 2023 that any house built before 1978 will need to have an LBP permit. LBP is lead base permit. There could be homes out there from that timeframe that do not contain lead, but it is highly unlikely, so most homes that we perform exterior work on will contain lead. To obtain a permit for a project, I need to hold a business license with the City of Oakland.

Walking the Site and Setting Expectations

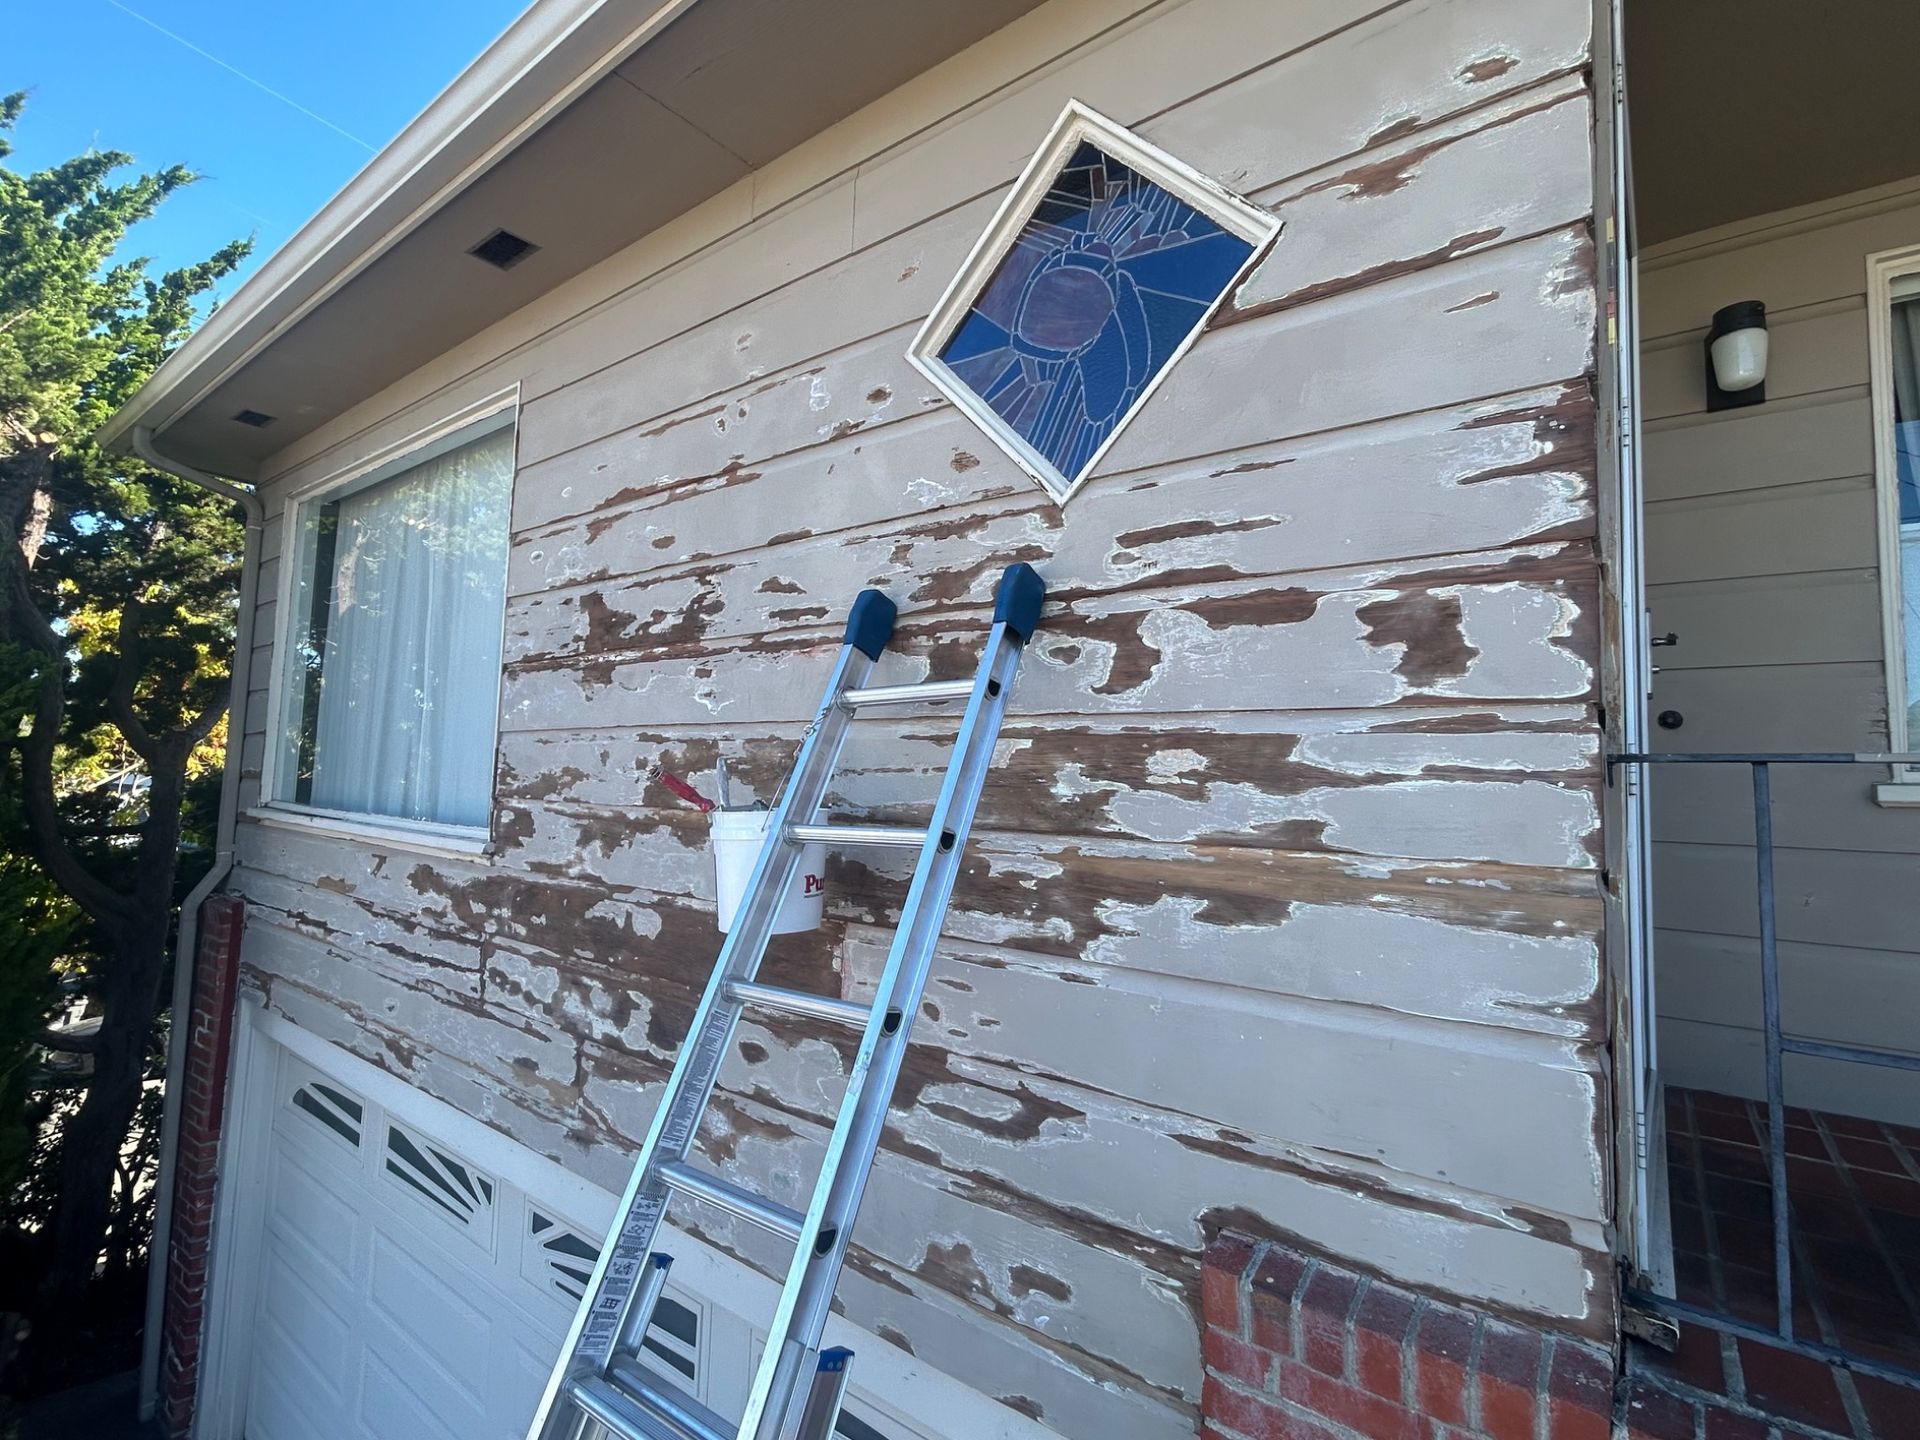
I am going to show you a project that we did in the City of Oakland recently that was a lead-based project. I showed up to this project, met the clients, walked the site, and pointed out the areas that were going to be troublesome and that we were most likely going to need a lead permit for, without even having to do a lead test. You can test by scraping chips off and sending them to a lab to determine whether it is lead or not, or there are quicker swab tests where the color of the swab tells you the result.

More than likely, this house has lead, and there is no reason to even do those tests, because we are going to be scraping down to bare surfaces. Our client agreed with that approach, so I finished the proposal, sent it over to them, they cleared it, and now we were ready to begin.

Applying for the Permit

What I have to do, even before we get to start, is apply for the lead-based permit. That requires me to fill out a work lead form, signed by my employees, covering our approaches and processes for how we are going to contain the lead. That will get approved, and then we are ready to officially begin on the job site.

Containment on the Job Site

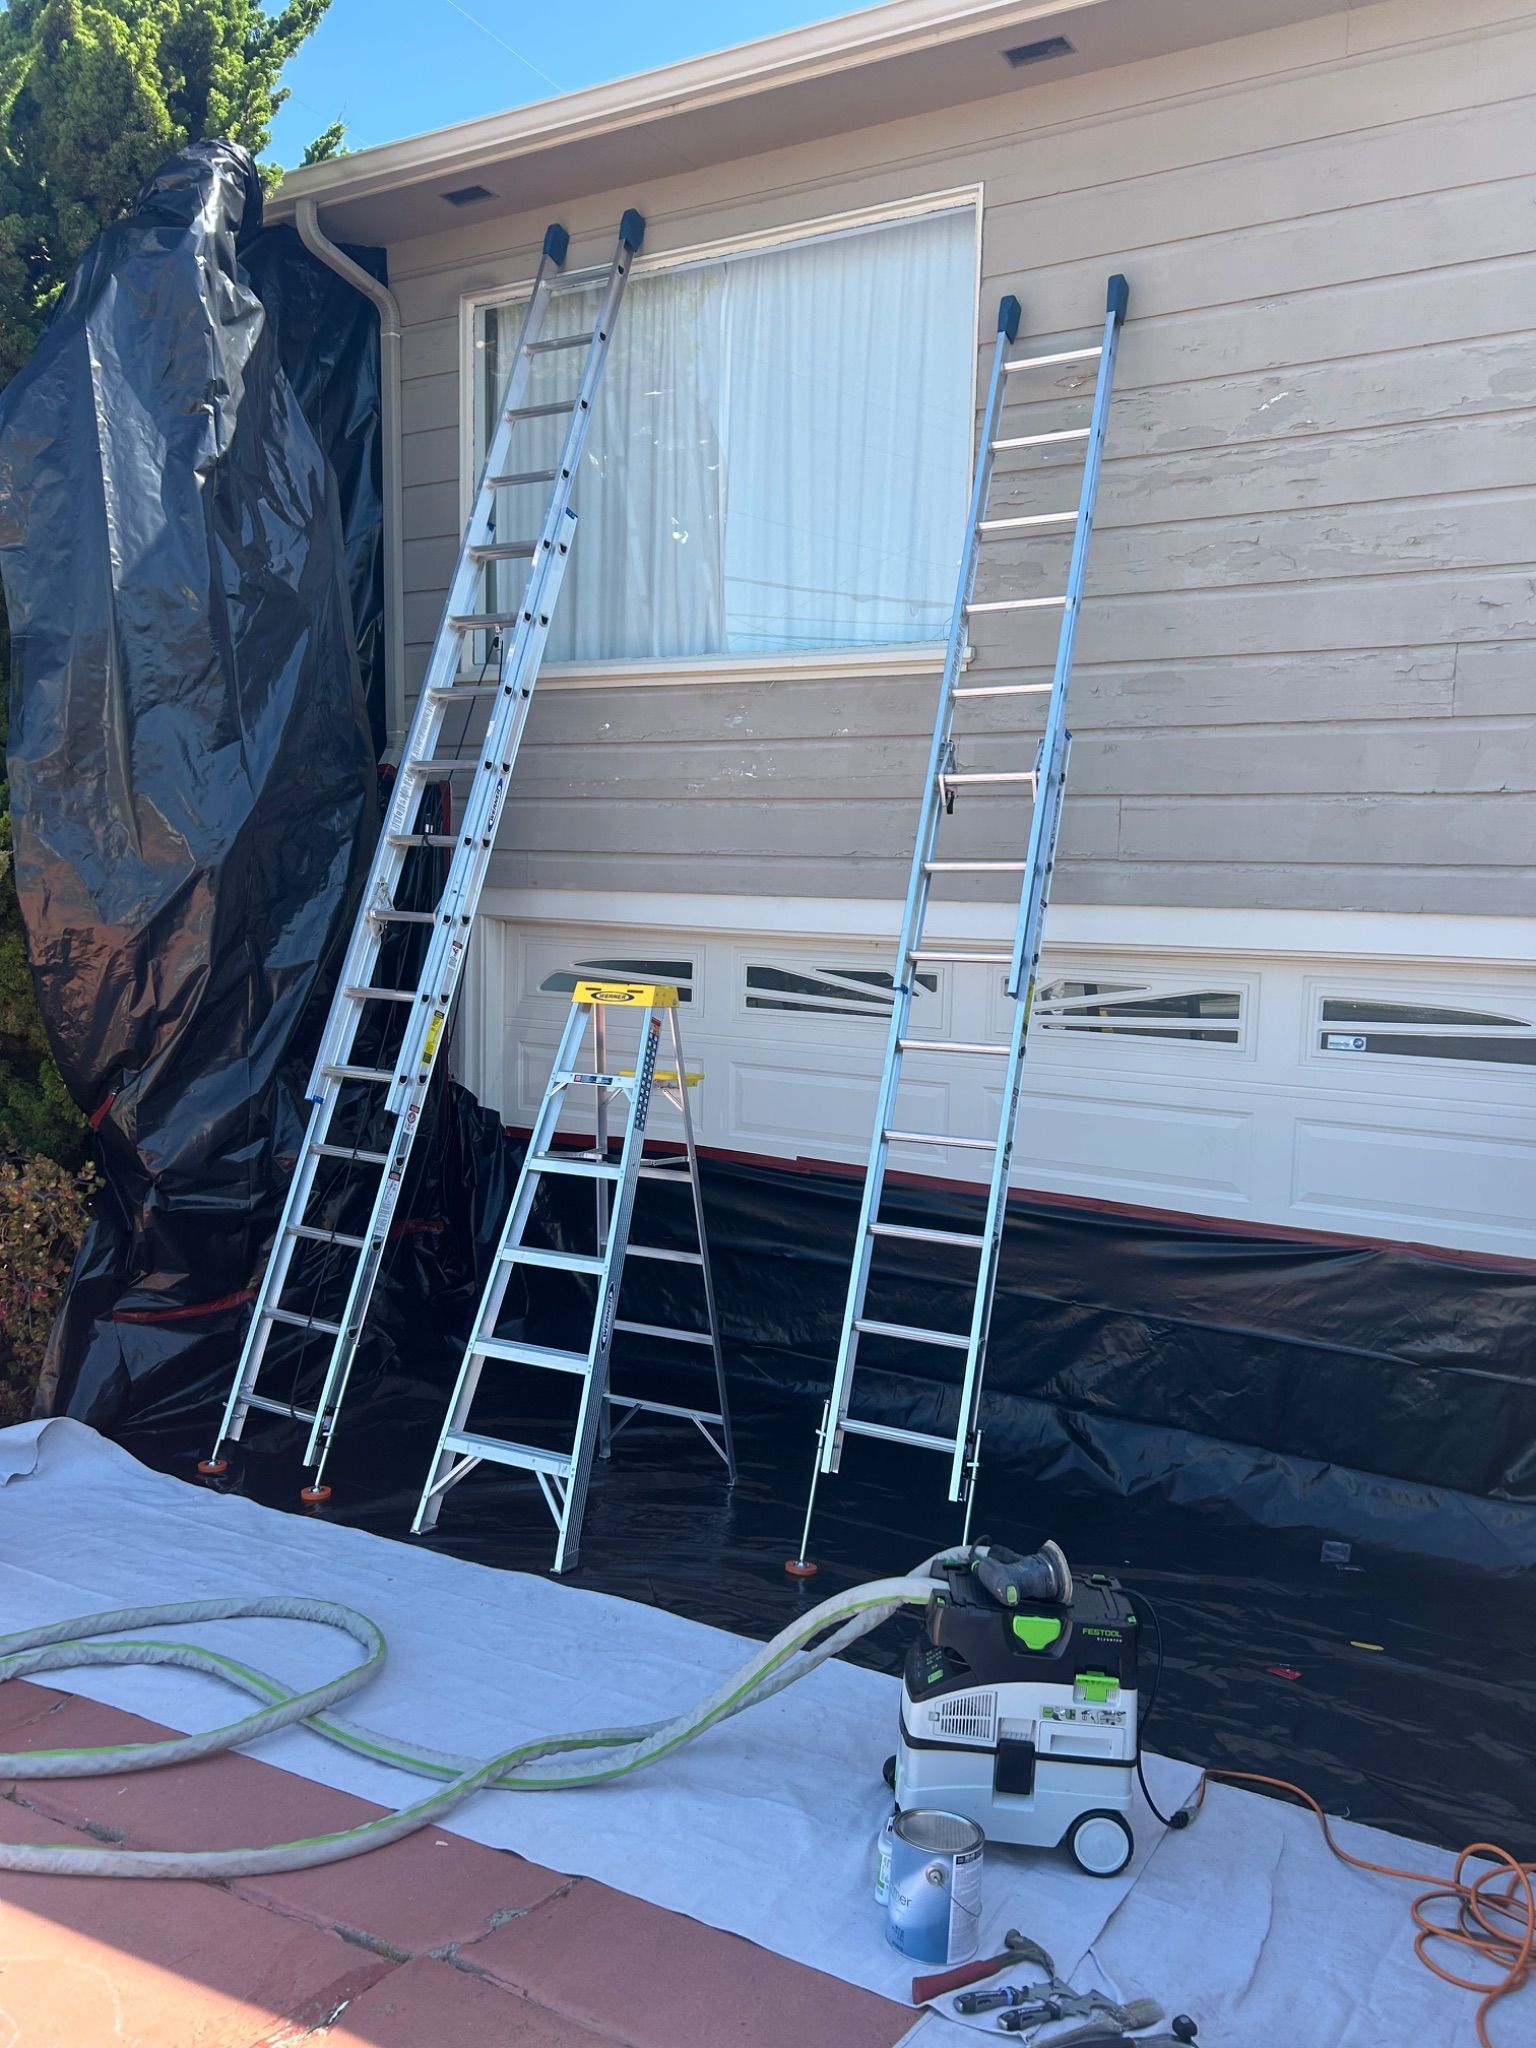
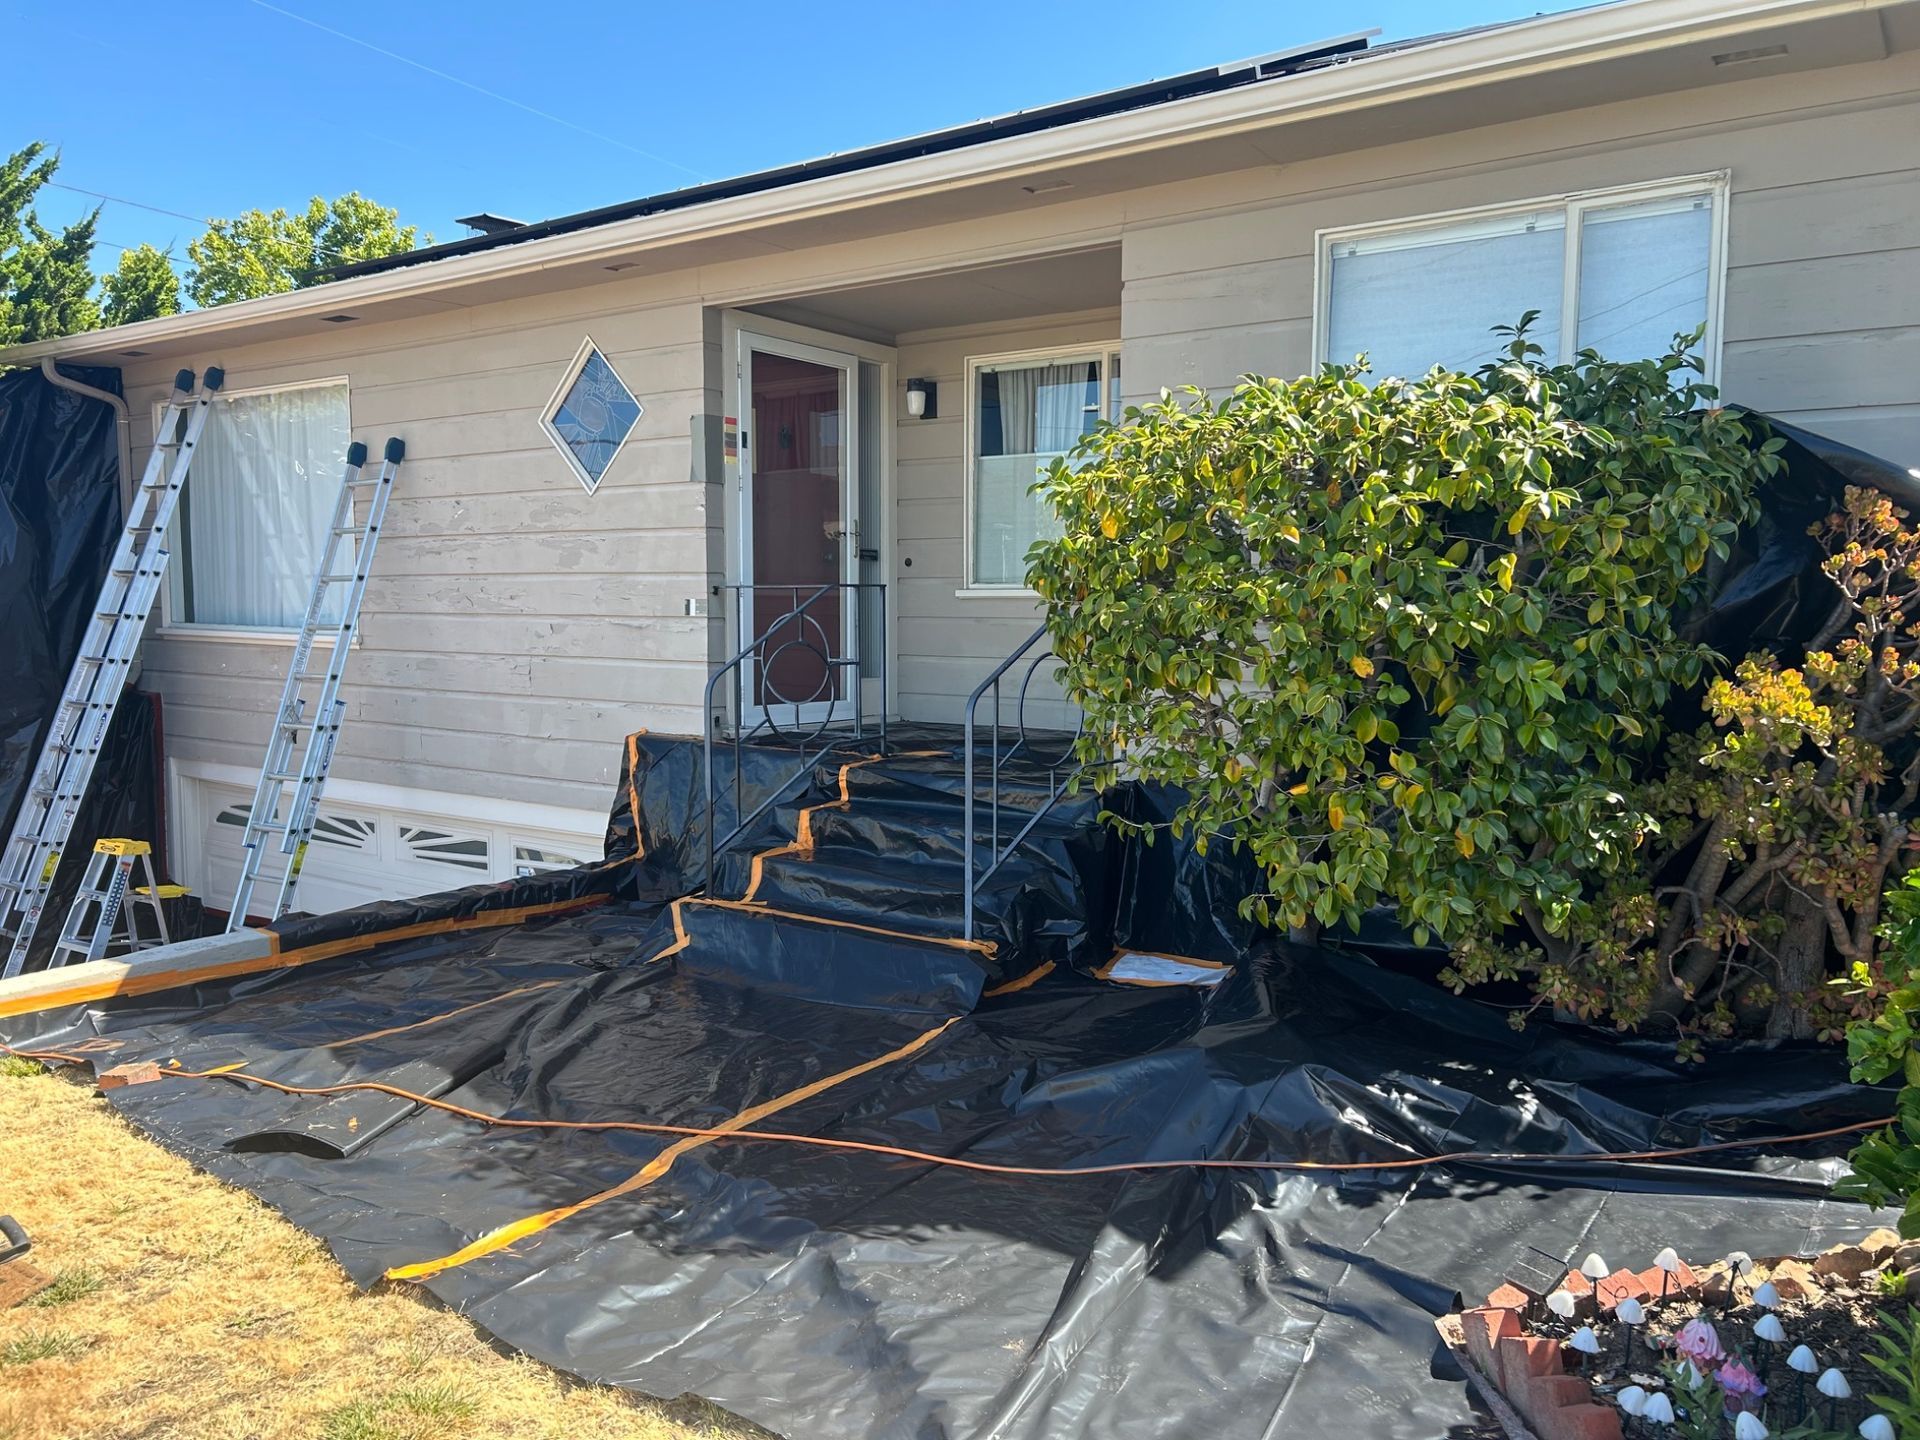
Once there, we start doing the processes that I have been trained on and that I have talked through with my guys, to contain the lead dust and chips that are going to come off this house. As you can see in the photos left and right, we have used six mil plastic, which is plastic that is very difficult to tear, and we have to run all that plastic out 10 feet. If we cannot go 10 feet, then we have to go vertical, and as you can see in the left-hand photo, we have to go up a tree and then tape it to the side of the house and the bottom of the house, so that it catches and captures all those dust particles.

Ladders leaning against a house exterior with a covered window and renovation tools below
Single-story house front porch with ladder, black tarp ground cover, and bushes in front yard

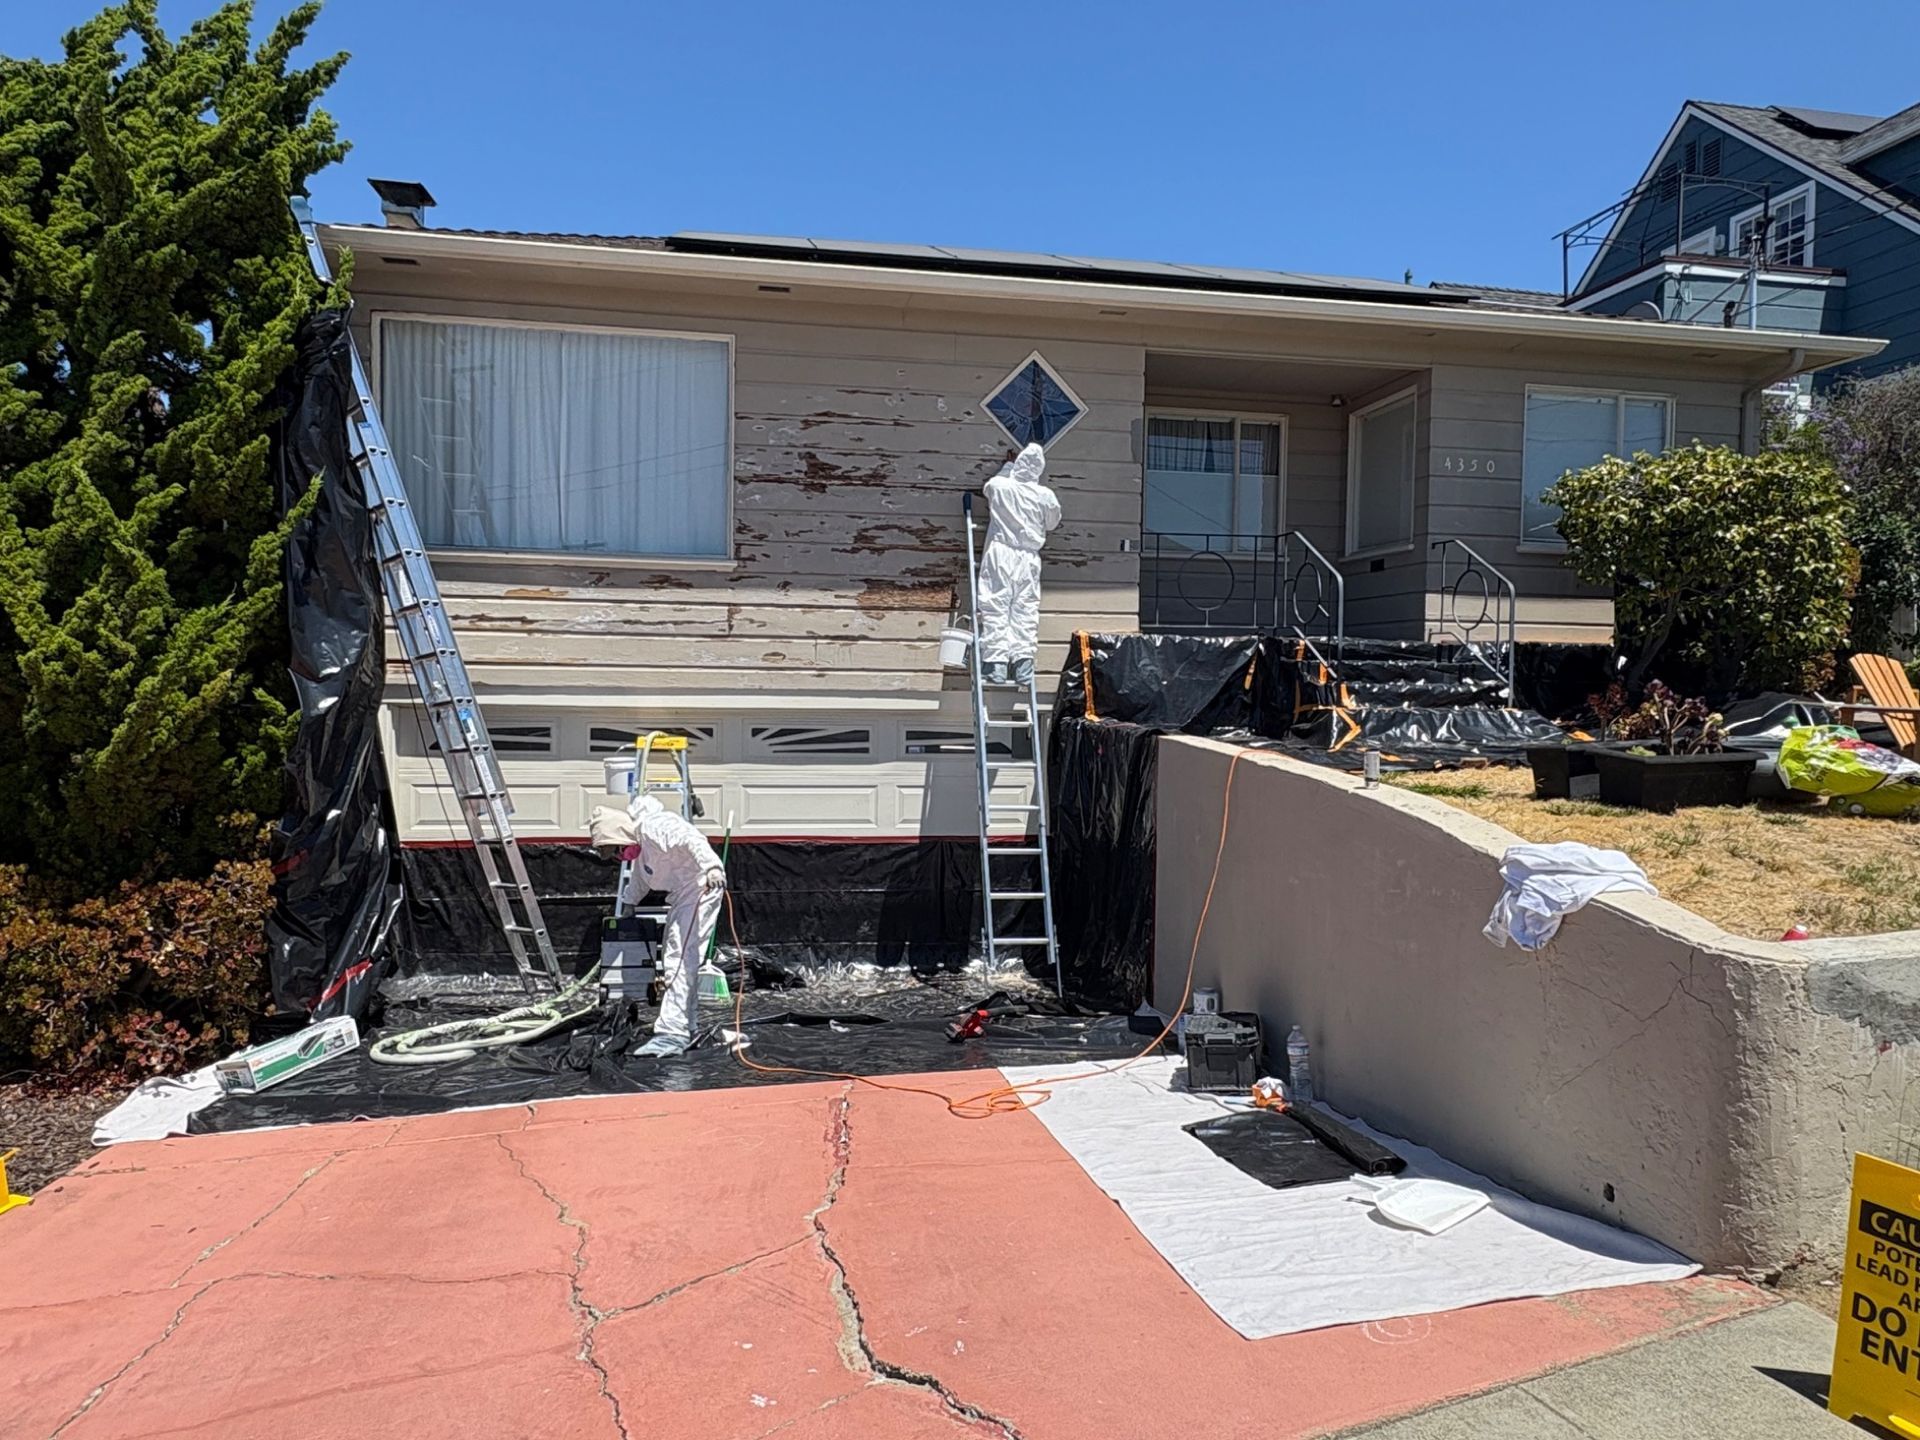
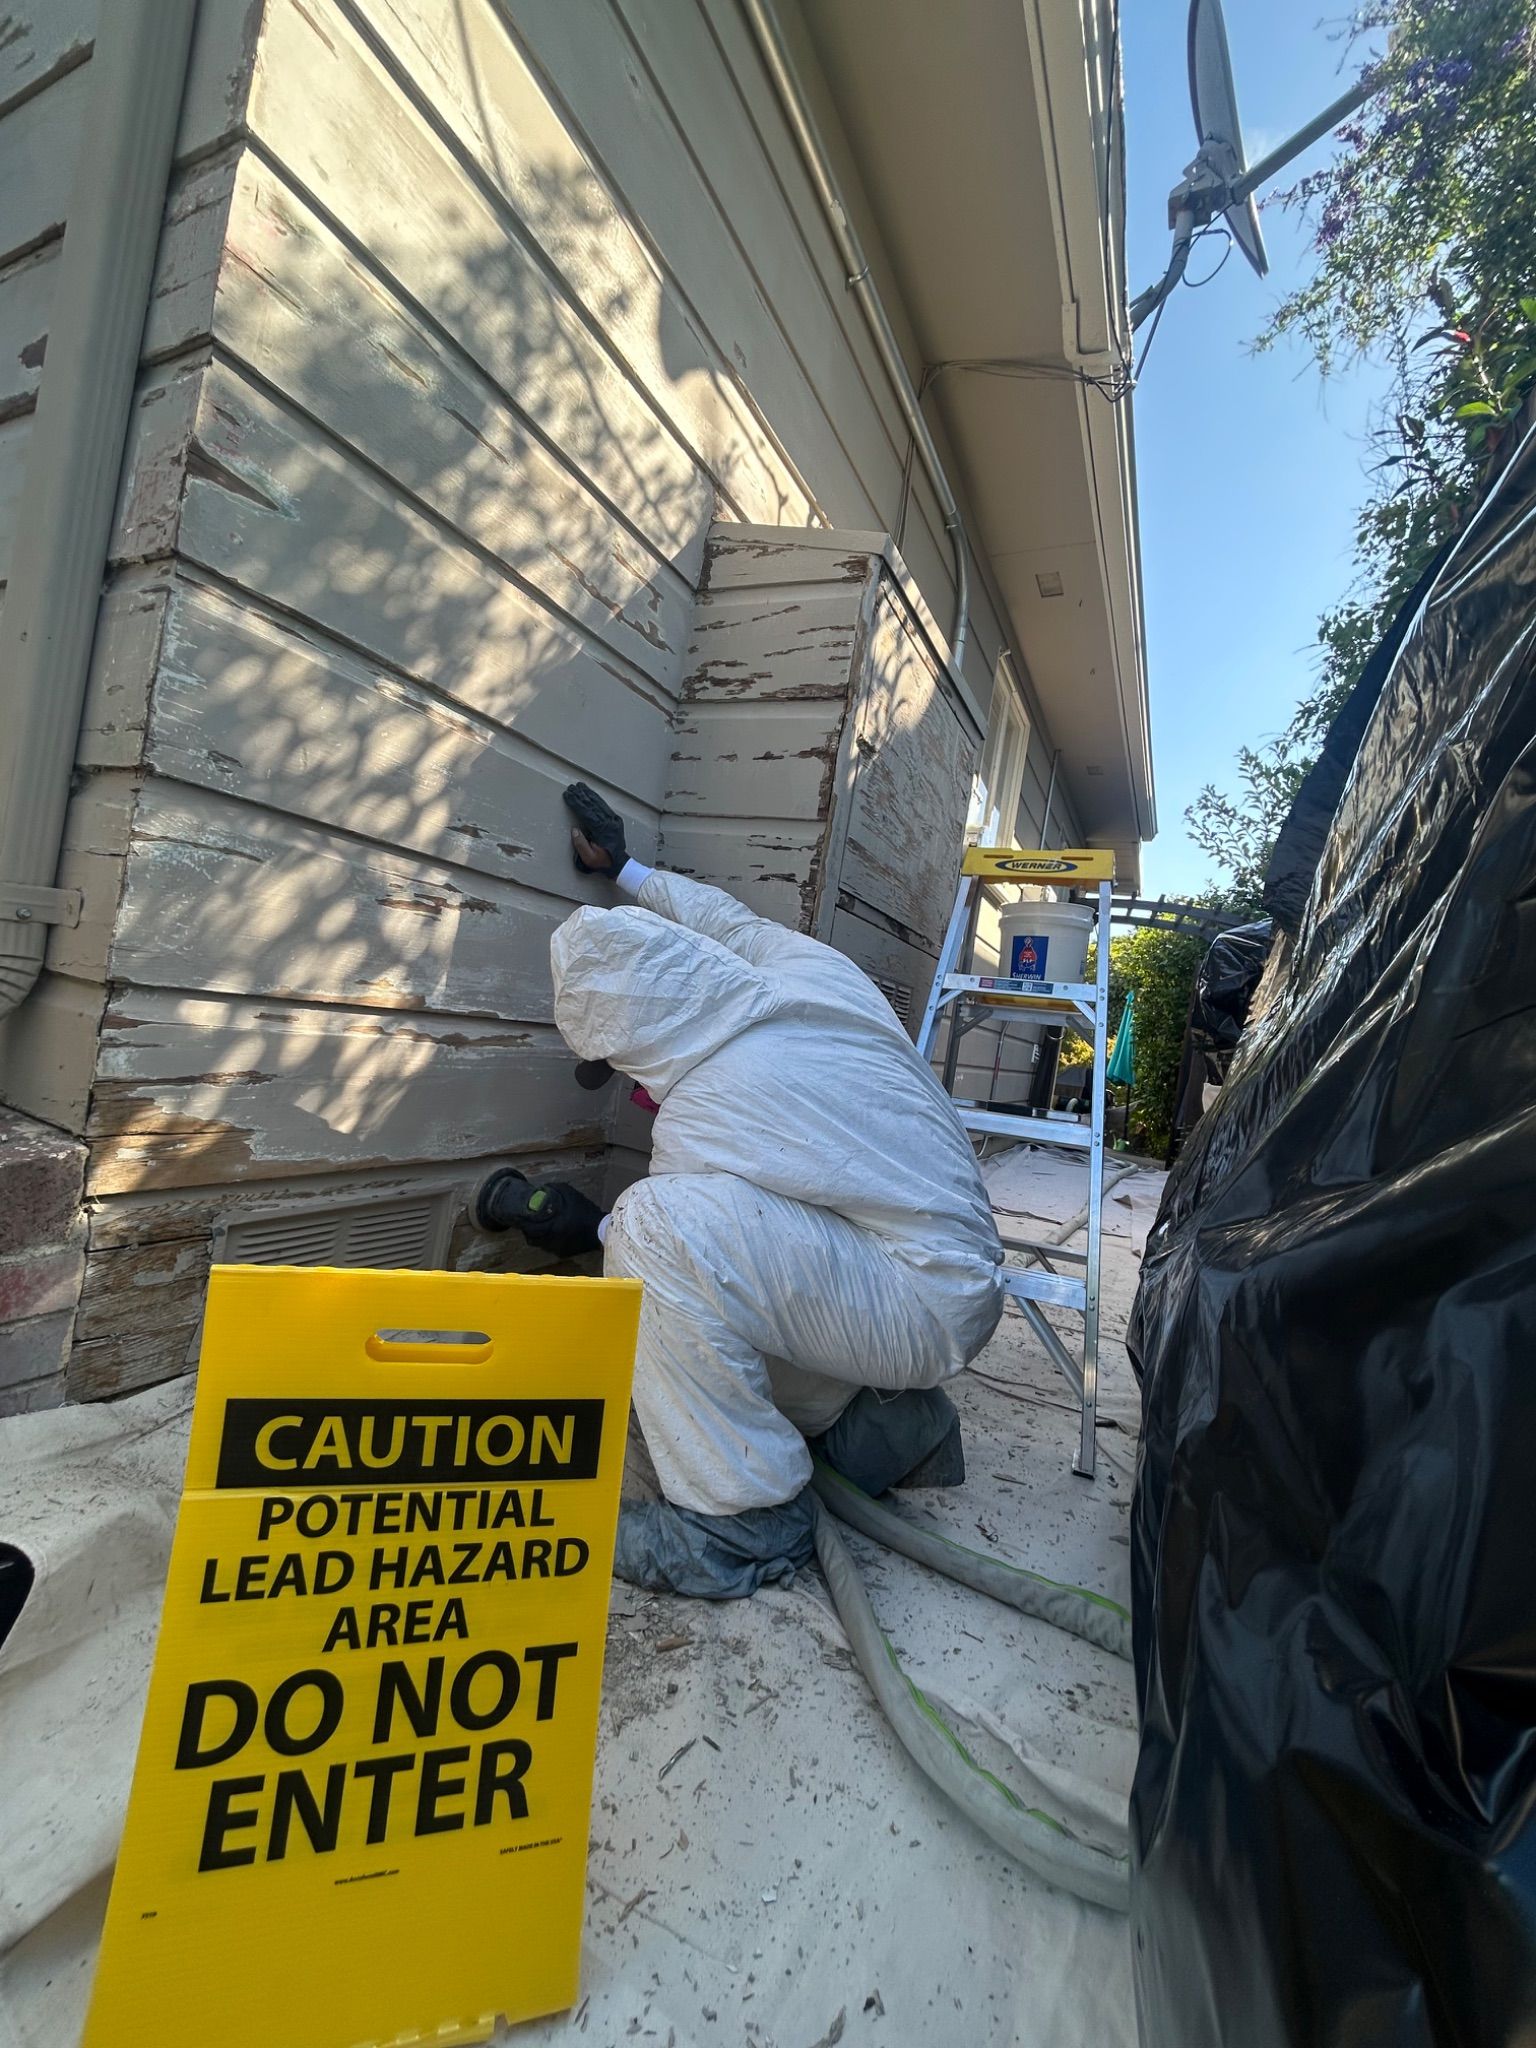
And in this round of photos, you can see my guys, Alex and Elias, going through the process of scraping and disturbing the lead.

Workers repairing a cracked red driveway outside a house with wood siding and a white gate
Worker in white protective suit inspecting house wall near a yellow “Do Not Enter” lead hazard sign.

The First City Inspection

Now, the other portion of this project is having and scheduling an inspection with the city to come out and make sure that we have all the proper PPE and materials to do the job. So we schedule them for the first or second day, depending on our layout, to show them that we can set it up accurately, perform properly, and have all the appropriate materials. What that means is we need to have my guys in suits, goggles, gloves, and respirators, and those get changed out daily to keep them safe.

On top of that, scraping and sanding need to be contained in the plastic, but also our sanders have to be hooked up to HEPA vacuums to be able to pull the dust at the same time as we are sanding the sides, keeping it all controlled. There are also signs that we need to put out so that people walking by are informed, as well as letting the neighbors know so they know what is going on. We passed the first inspection, so we were allowed to continue the project.

Ladder leaned against weathered house siding beneath a blue window, with peeling paint visible.

Planning the Work One Side at a Time

Now, we strategically plan these jobs around our abilities and what we are capable of doing in a day, because we need to be able to set up all this plastic, ladders, and tape in a day, and we also need to be able to clean it at the end of the day. So we focus on one side at a time when it comes to the house, so that we can keep everything nice and smooth and controlled.

Priming and Encapsulating

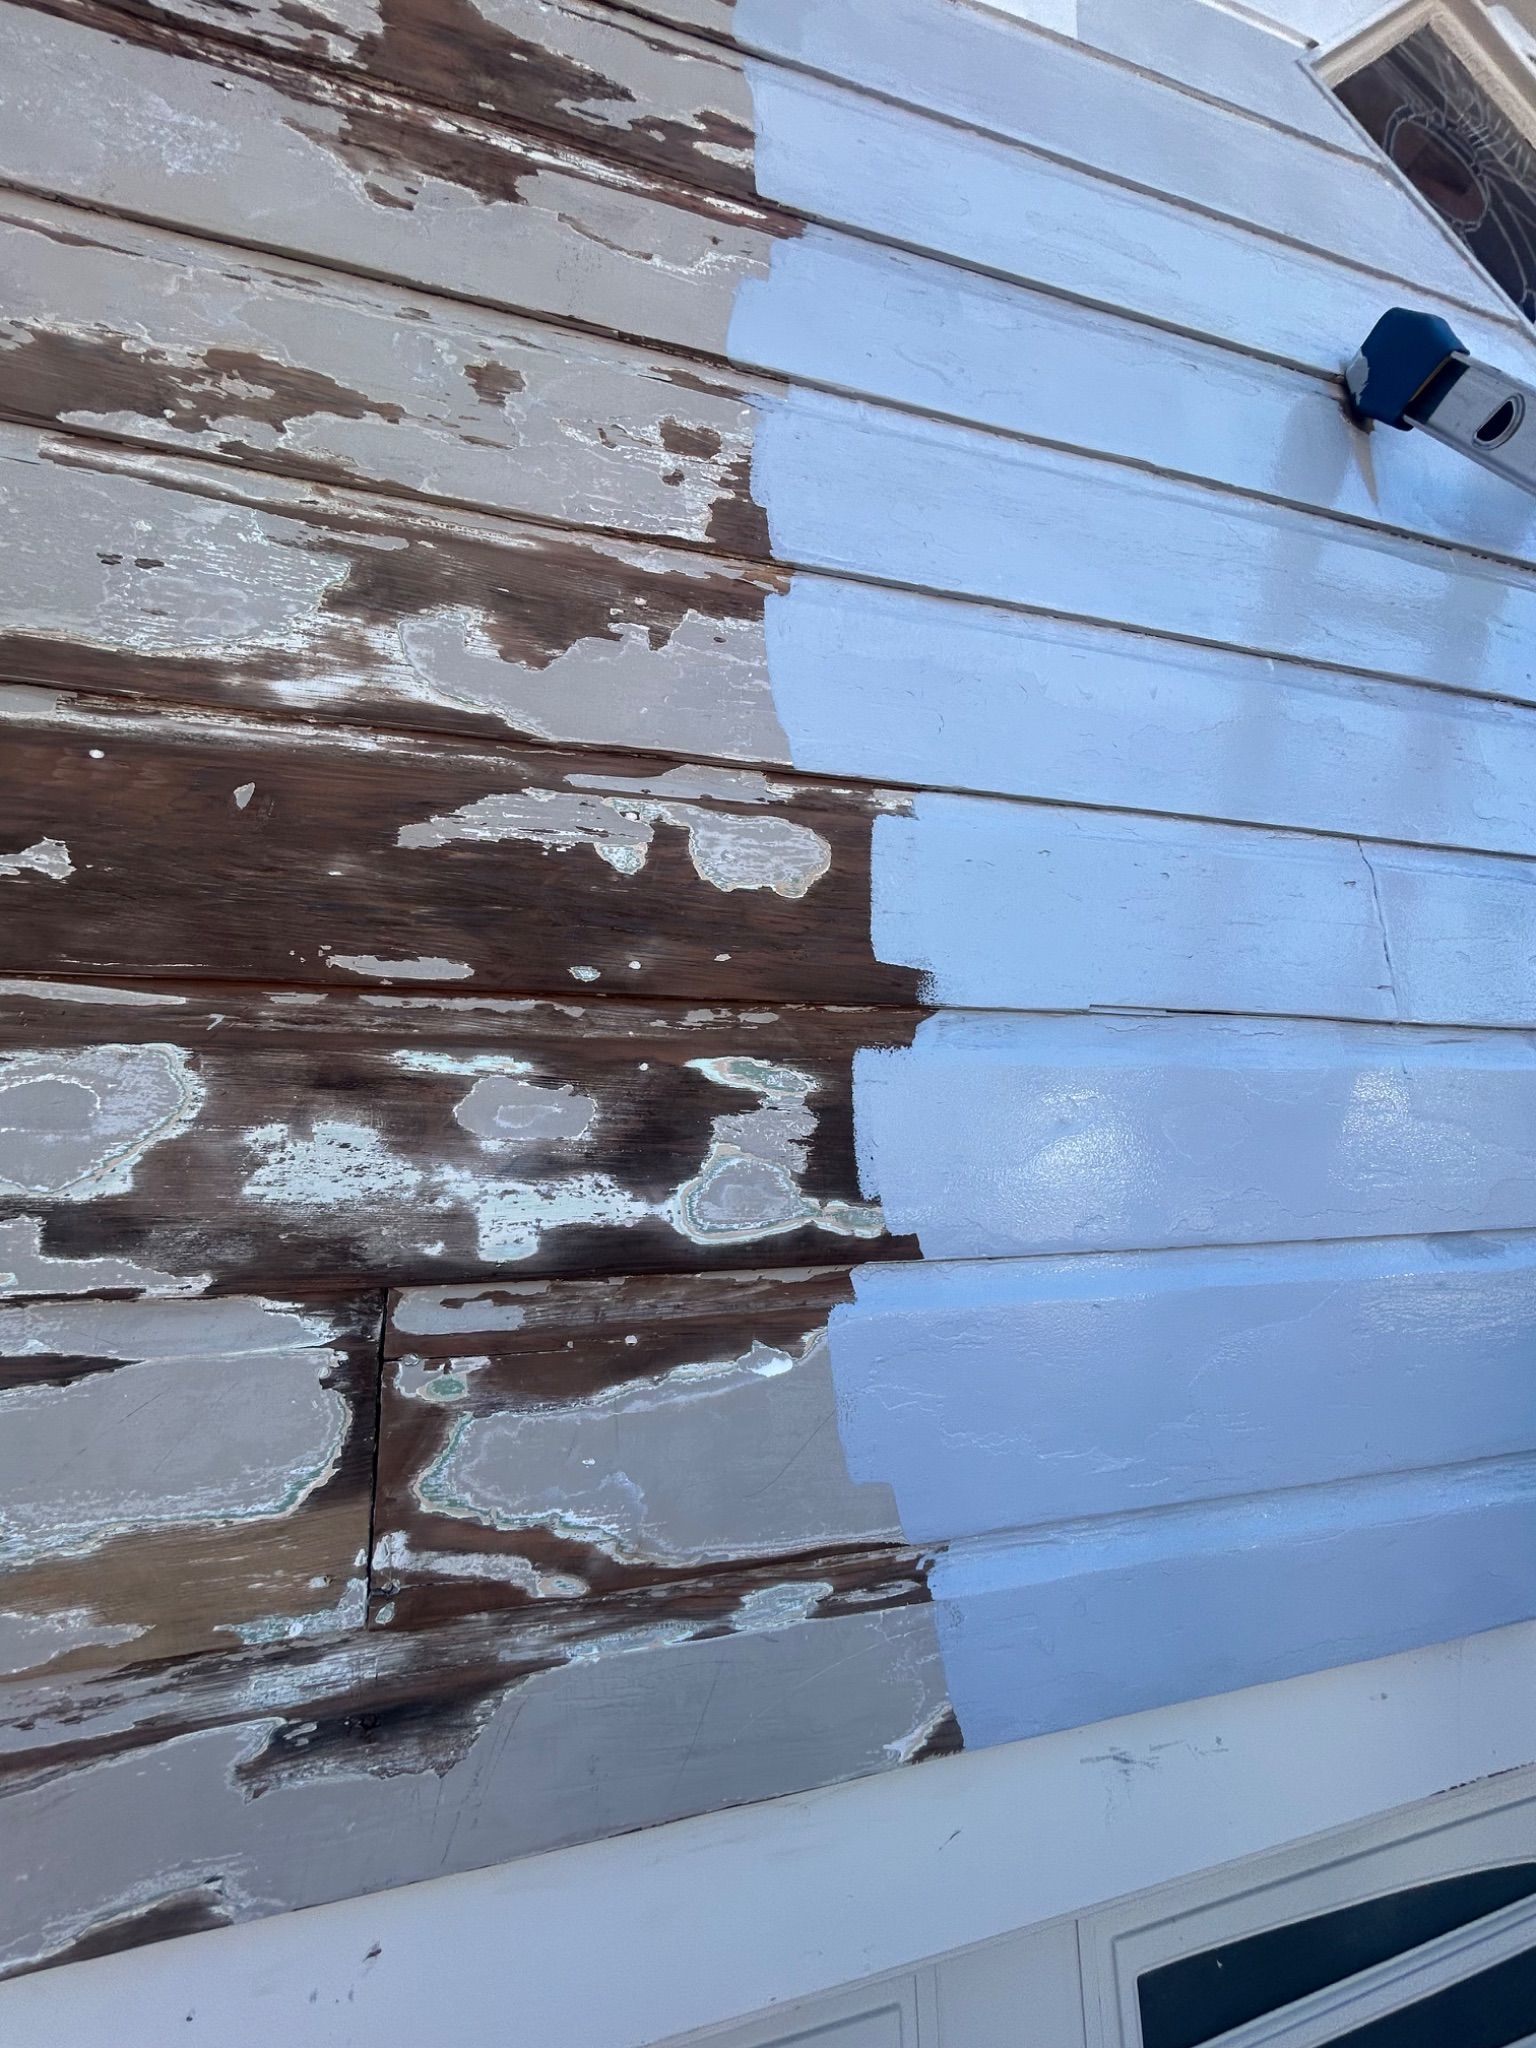
Once we scrape and sand those sides, we start the priming process. When we prime it, we encapsulate the old paint. Once it is primed, we are then safe to continue without having to repeat the full plastic process every single day, since we are going to be working on the surface out front now and not the surface behind it. Our clients are safe, and we are safe. So we prime the complete house and make sure everything is nice and solid.

Peeling brown paint on weathered wooden siding beside a blue exterior wall
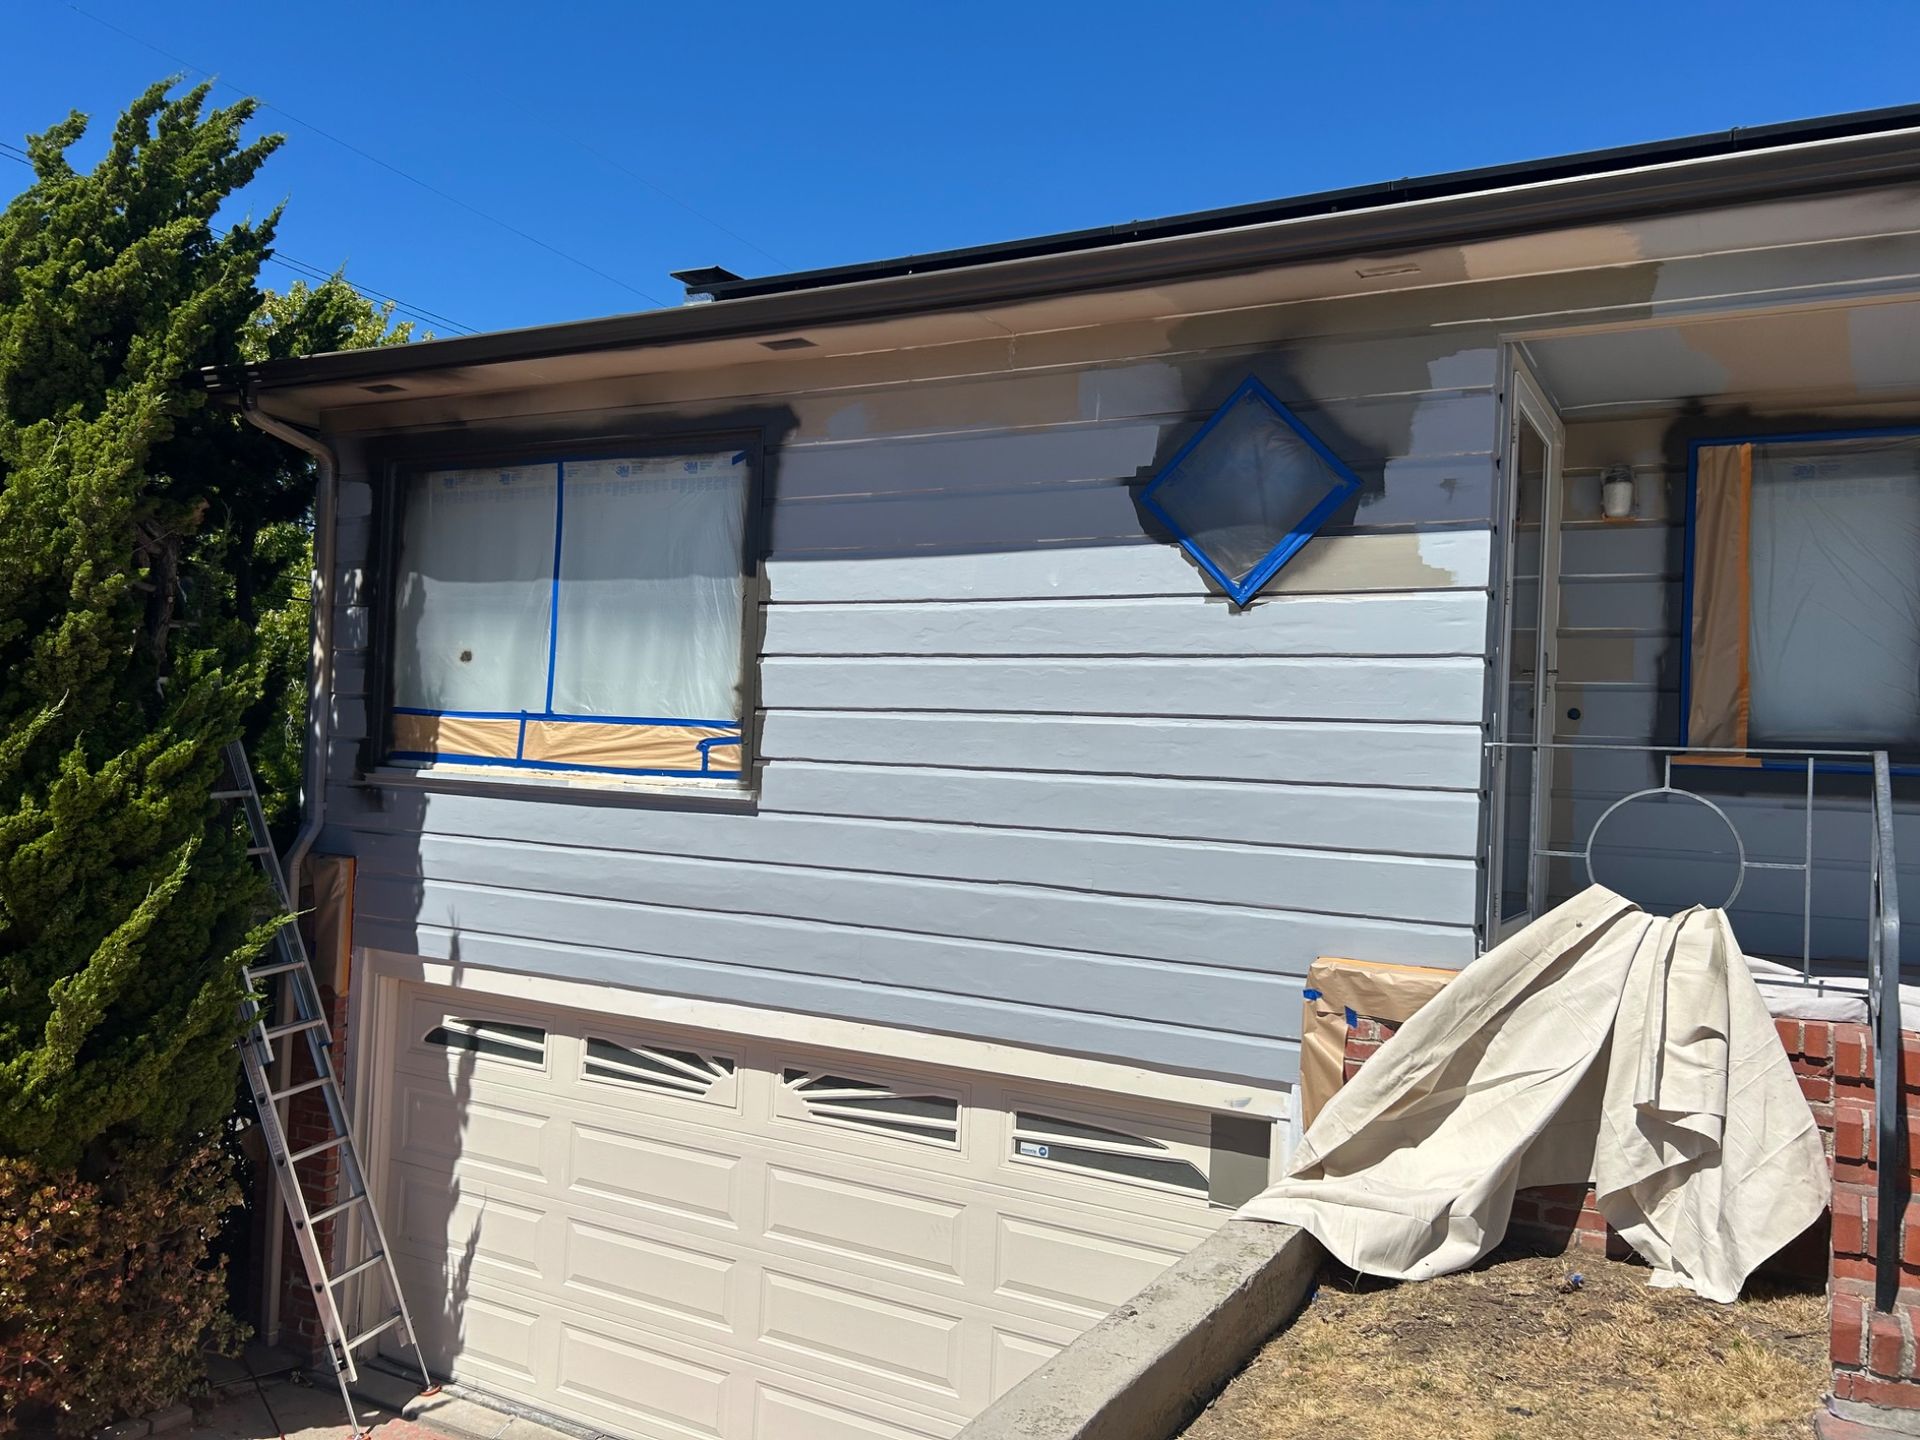
Small house exterior with blue-gray siding, a window, and covered items near the porch in bright sunlight

Patching, Sanding, and Caulking

Then we begin our patching process. Because of the multiple layers that have been peeling off this house, there is a lot of unevenness in the siding, and we want to balance some of that out, so we apply patching material to help level those areas. Now, I do not want to overpack it, because it truly will break down in the sun, so we like to do a lighter skim coat. Then we sand that skim coat, and we prime it again to encapsulate it, so it has multiple barriers to it. Once that process is done, we move to our caulking to fill in any gaps that opened up and make sure that the house is weather resistant moving forward.

Color and the Finished Product

Then the actual fun part can begin. We mask the windows and hardware fixtures, anything that is not going to be receiving paint, so we can keep them protected, and then we start being able to apply the colors. On this project, we partnered with our colorist to help us and our clients select colors that would be fitting for the home and something that they want to be seeing daily, and she came up with a phenomenal design.

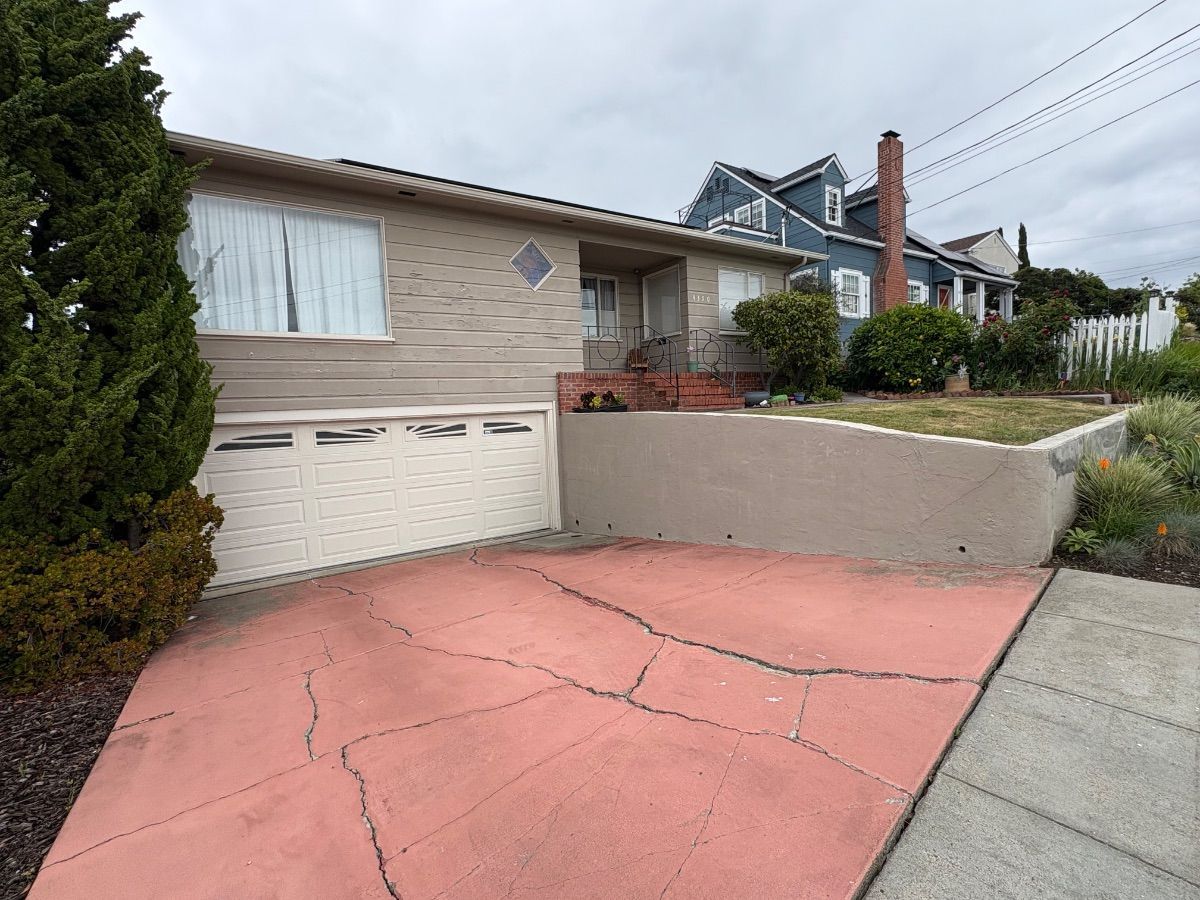
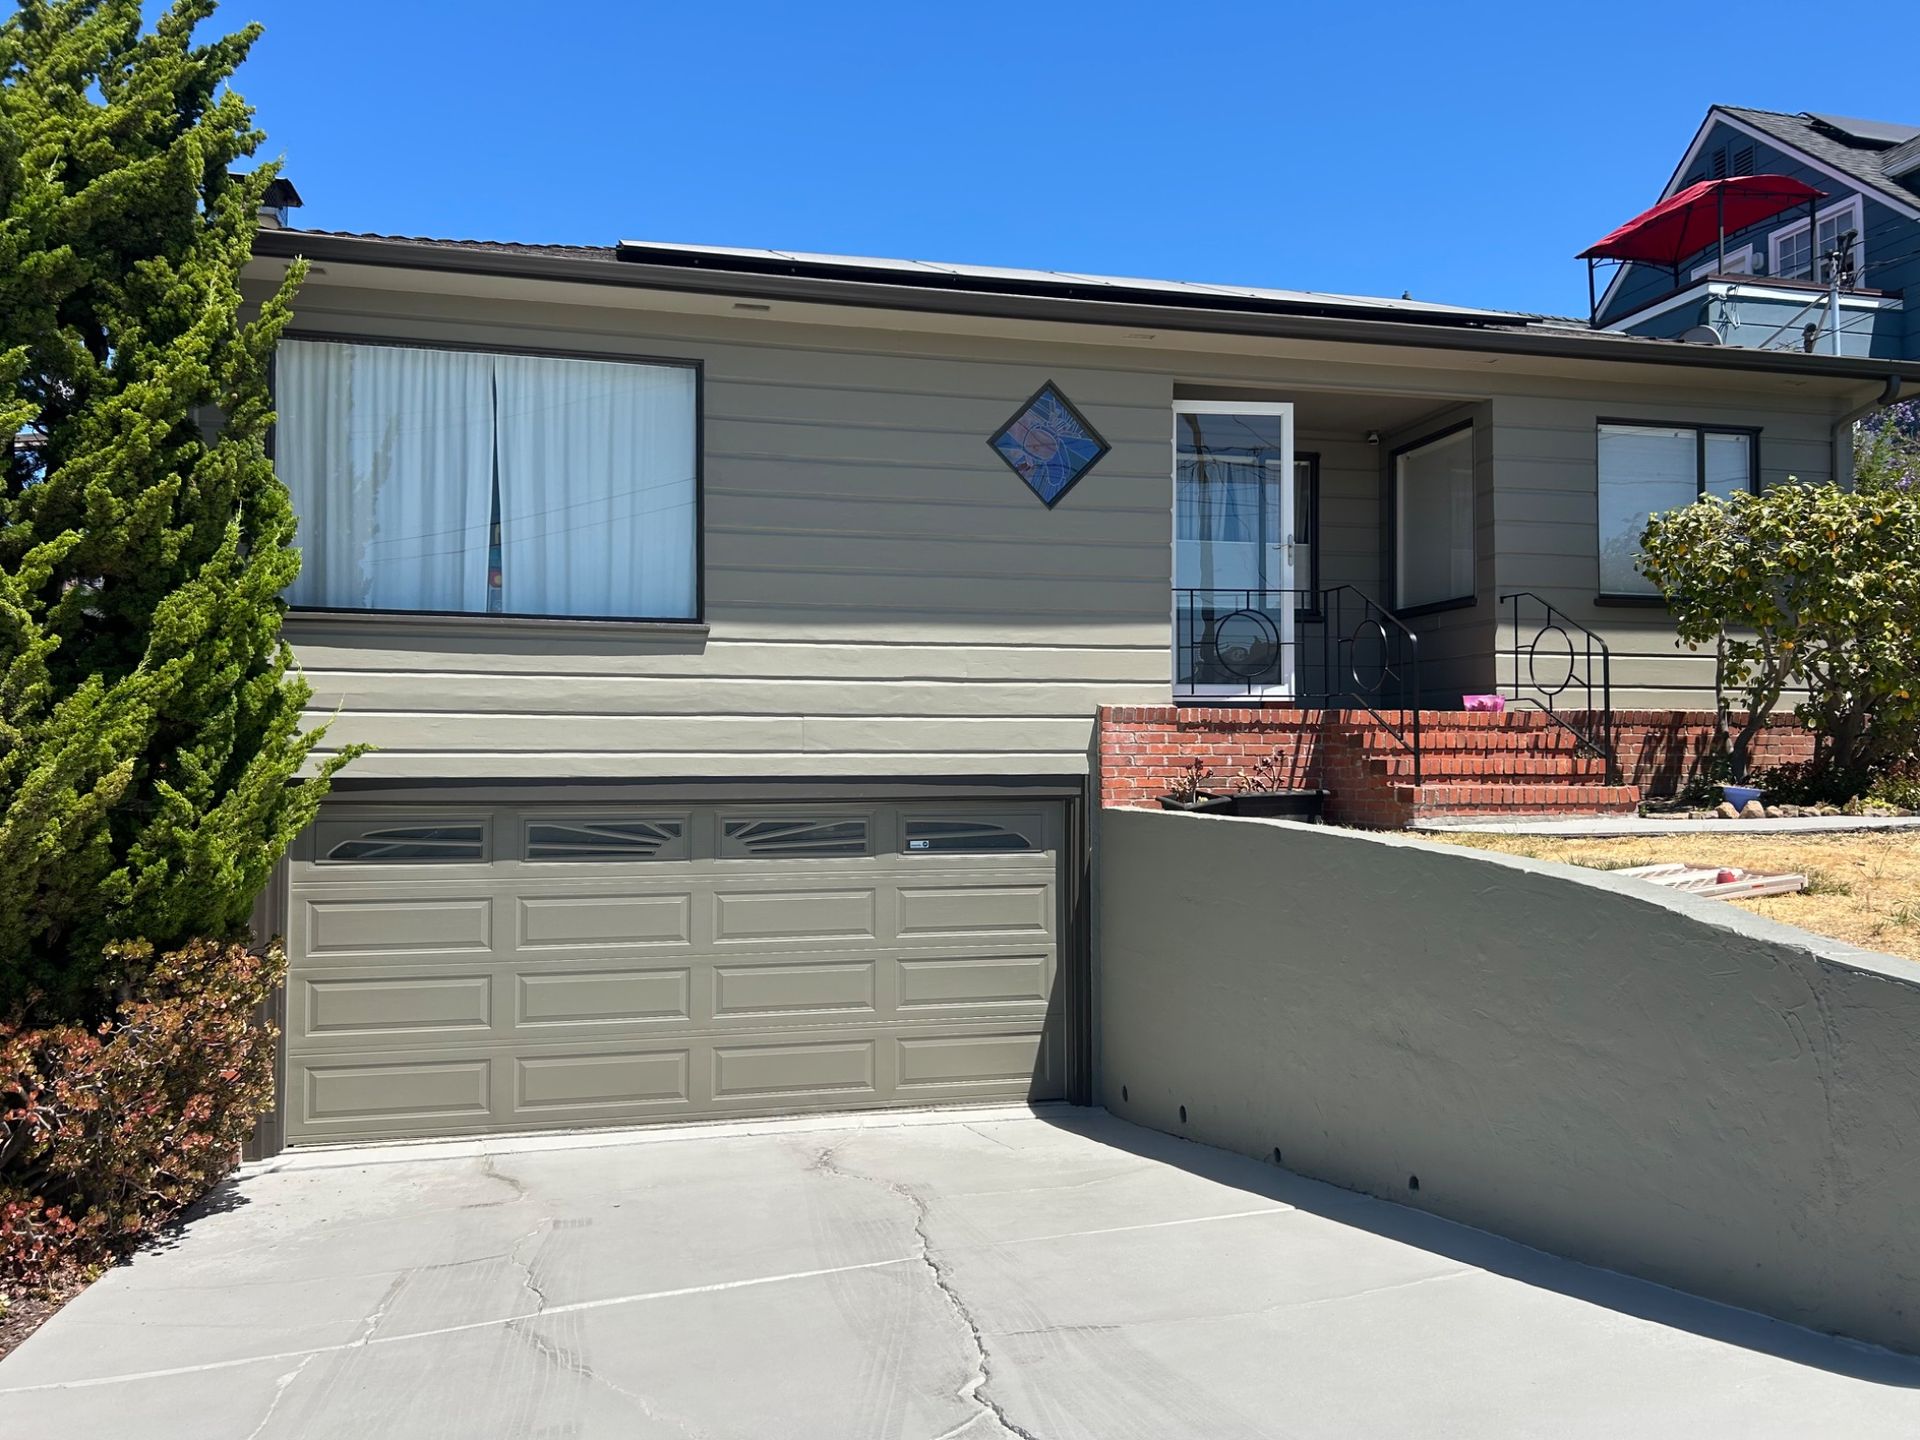
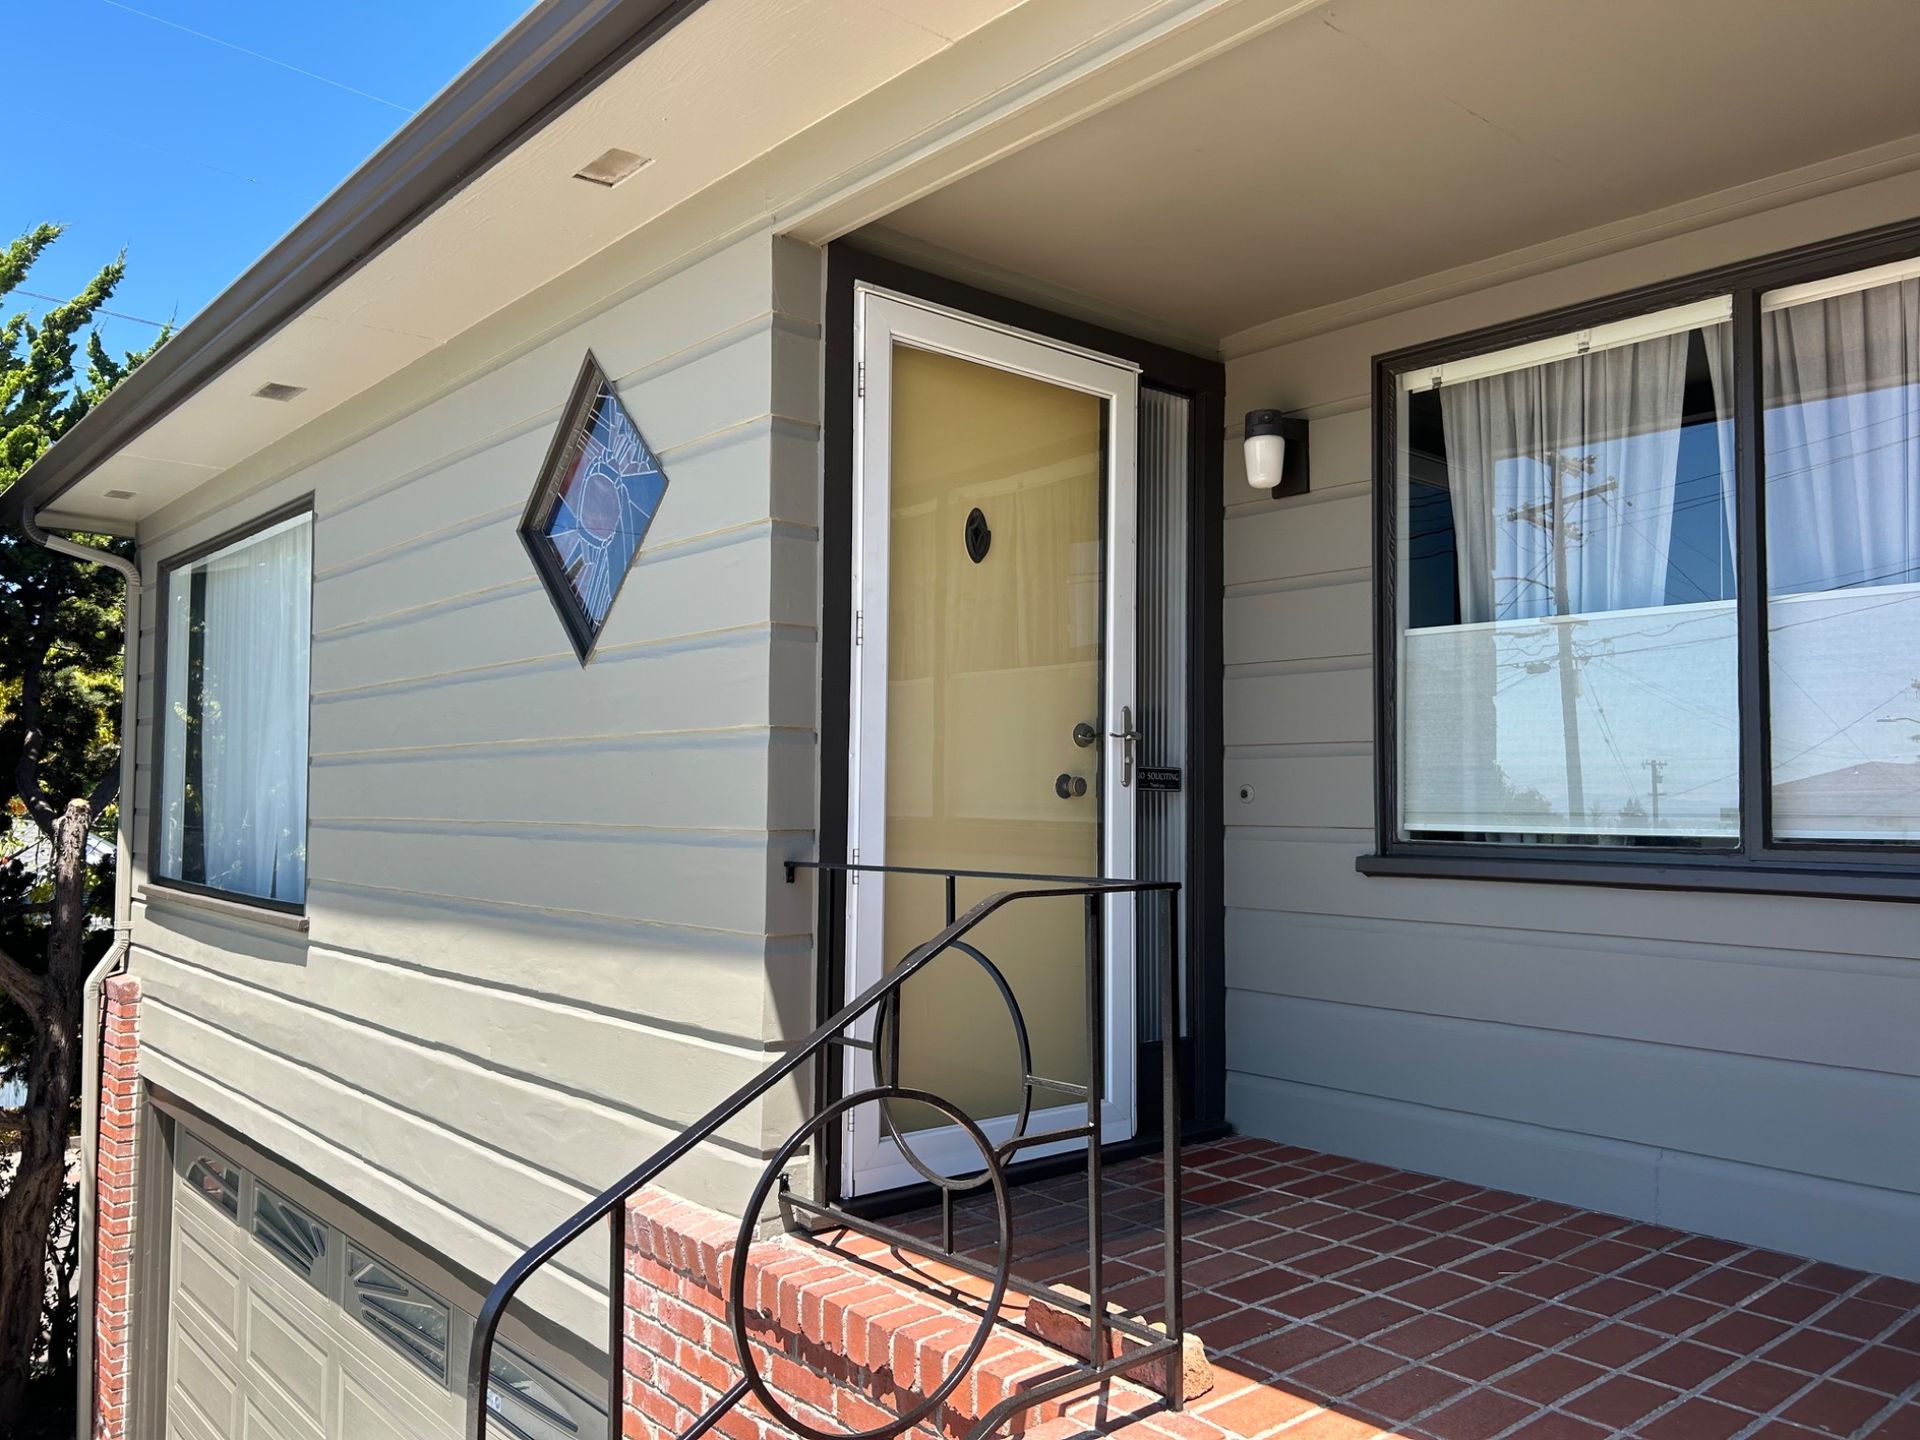
So we finished applying all of the different colors to all of the different areas, and these are our final results. As you can see, the front is completely re-lifted, and the trim pops. This was a four-color choice, as we did the trim in one color, the body in one color, the garage door and retaining wall in one color, and the eaves and the driveway in another color. They all blend effortlessly well and will last for a long, long time to come.

Driveway and garage of a house with a pink concrete surface and beige exterior walls
Suburban house exterior with garage, front porch, and a concrete driveway under a clear blue sky
Front porch of a beige house with a yellow door, brick steps, and black railing.

The Final Inspection

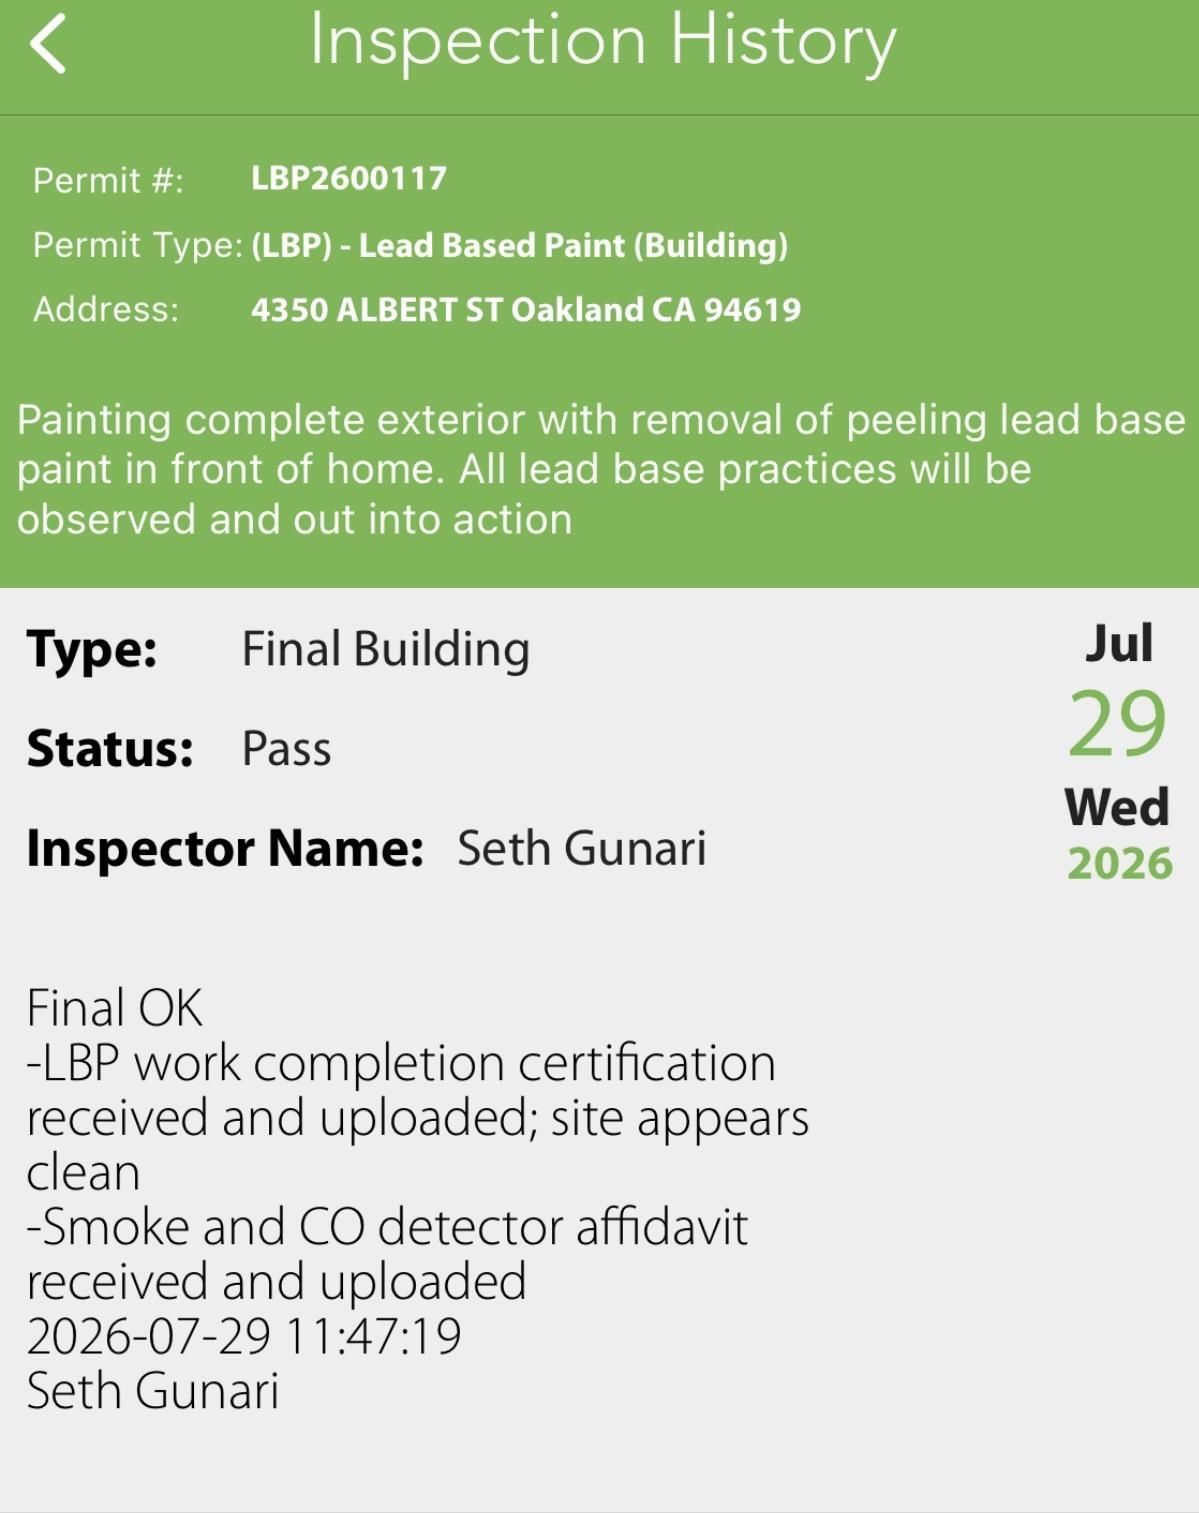
At the end of a project like this, there is one more step to take. I have to call the city and schedule a final inspection. That inspection entails walking around the premises and making sure all chips and particles are clean and that there is no debris left behind. They also have us fill out a smoke detector and carbon monoxide detector validation, which I handed off to my client. They inspected our site, determined it was clean, and we passed. So this is a successful lead base project completion.

Inspection History screen showing permit details and final building pass status.

Call a Pro

Many homes out there contain lead in the interior and exterior. Don't be afraid to call a pro to come in and handle those areas appropriately. Don't put yourself or others around you at risk. We know what we are doing, and we know how to handle it to keep everyone safe.

Recent Posts

Front porch of a gray Victorian house with white trim and decorative columns
By Chad Feagley June 8, 2026
See how Cutting Edge Painting matched century-old stained wood on new baseboards during a historic 1929 MacGregor home restoration
Person painting a white wall with a long-handled roller on a ladder
By Chad Feagley June 8, 2026
See how Cutting Edge Painting tackled a full interior repaint of a 1929 Albany home

Two-story beige house with lit windows, a front yard, and trees at dusk
By Chad Feagley May 7, 2026
Choosing the right exterior paint colors means balancing aesthetics, materials, and architecture.
Bright kitchen with white cabinets, dining table, and arched doorway under warm ceiling lights
By Chad Feagley April 30, 2026
Learn how to choose interior paint colors that tell a story in your home.
Elegant living room with wooden furniture, patterned rugs, fireplace, and tall windows with curtains.
By Chad Feagley April 23, 2026
Discover how color shapes emotion, mood, and experience.
Dark blue houseboat on a canal beside a dock, with a person in an orange jacket under a clear sky.
By Chad Feagley April 16, 2026
Chad Feagley of Cutting Edge Painting explains paint system selection for salt-air environments on a Point Richmond waterfront home.
Dark gray waterfront building with bay windows and water below a bright sky
By Chad Feagley April 10, 2026
Cutting Edge Painting walks through the full exterior prep process on a waterfront home in Point Richmond, CA

Two-story gray house with front walkway, palm trees, and garage under bright sunlight
By Chad Feagley April 3, 2026
See how Cutting Edge Painting handles a exterior project for waterfront home in Point Richmond, California from the first walkthrough to scaffolding setup.